- Mail settings (when using gmail)
- It is a setting for command response with gmail
- You can operate IOT-House commands and responses remotely via Gmail.
- Command output terminal High / Low, response input terminal High / Low status, temperature, humidity, barometric pressure, air quality values, graphs, photos, videos, etc.
- Checks new emails every
Email check interval hourly, executes the keyword content that matches Subject (keyword), and returns a response.
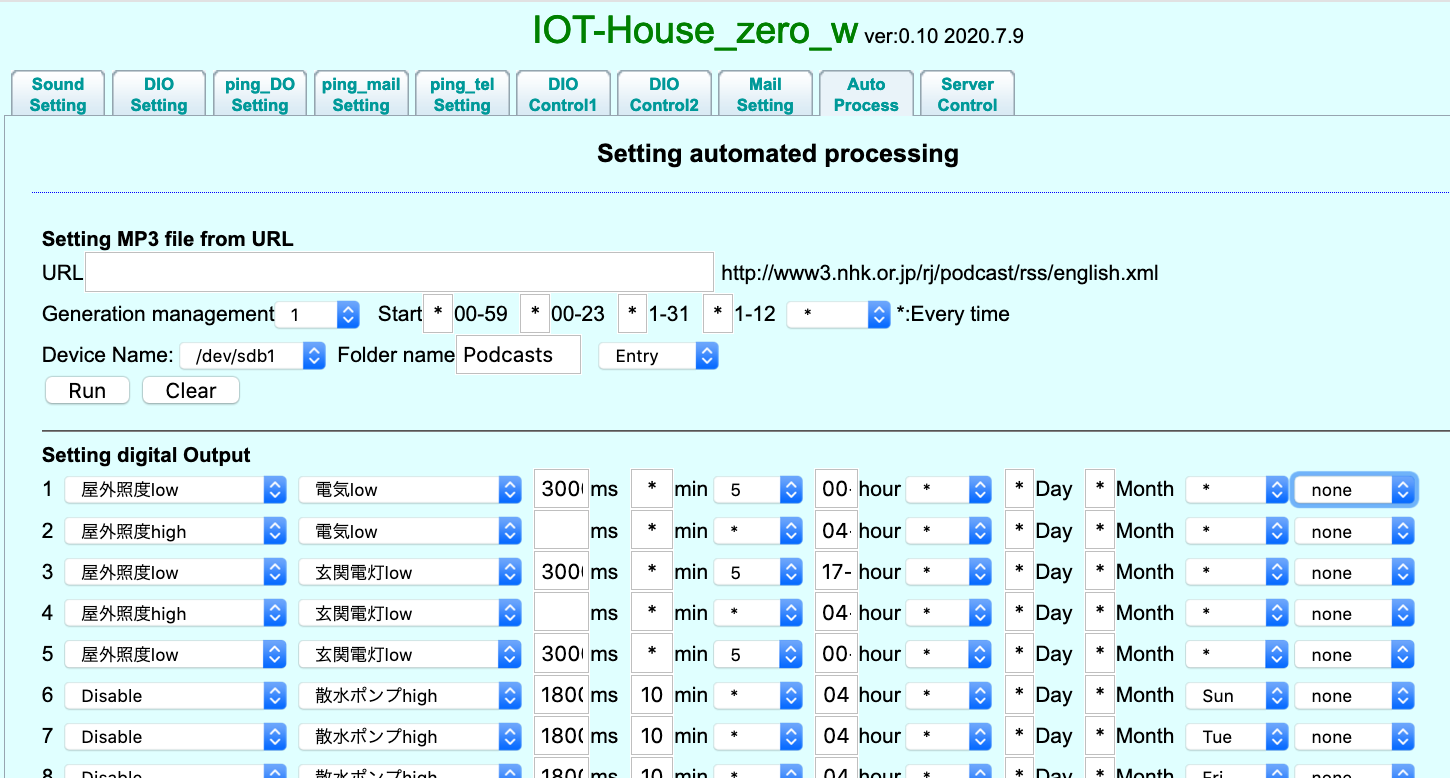
- Email settings tab
- You can operate IOT-House commands and responses remotely via Gmail.
- Command output terminal High / Low, response input terminal High / Low status, temperature, humidity, barometric pressure, air quality values, graphs, photos, videos, etc.
Mail command
To: dokokanodareXX@gmail.com
Subject: iot009
Body: none
Mail Response
From:root <dokokanodareXX@gmail.com>Date: Tuesday, September 22, 2020 10:53 10:53To:dokokanodareXX@gmail.comSubject:iot009 IOT-House report
Body: Continued below
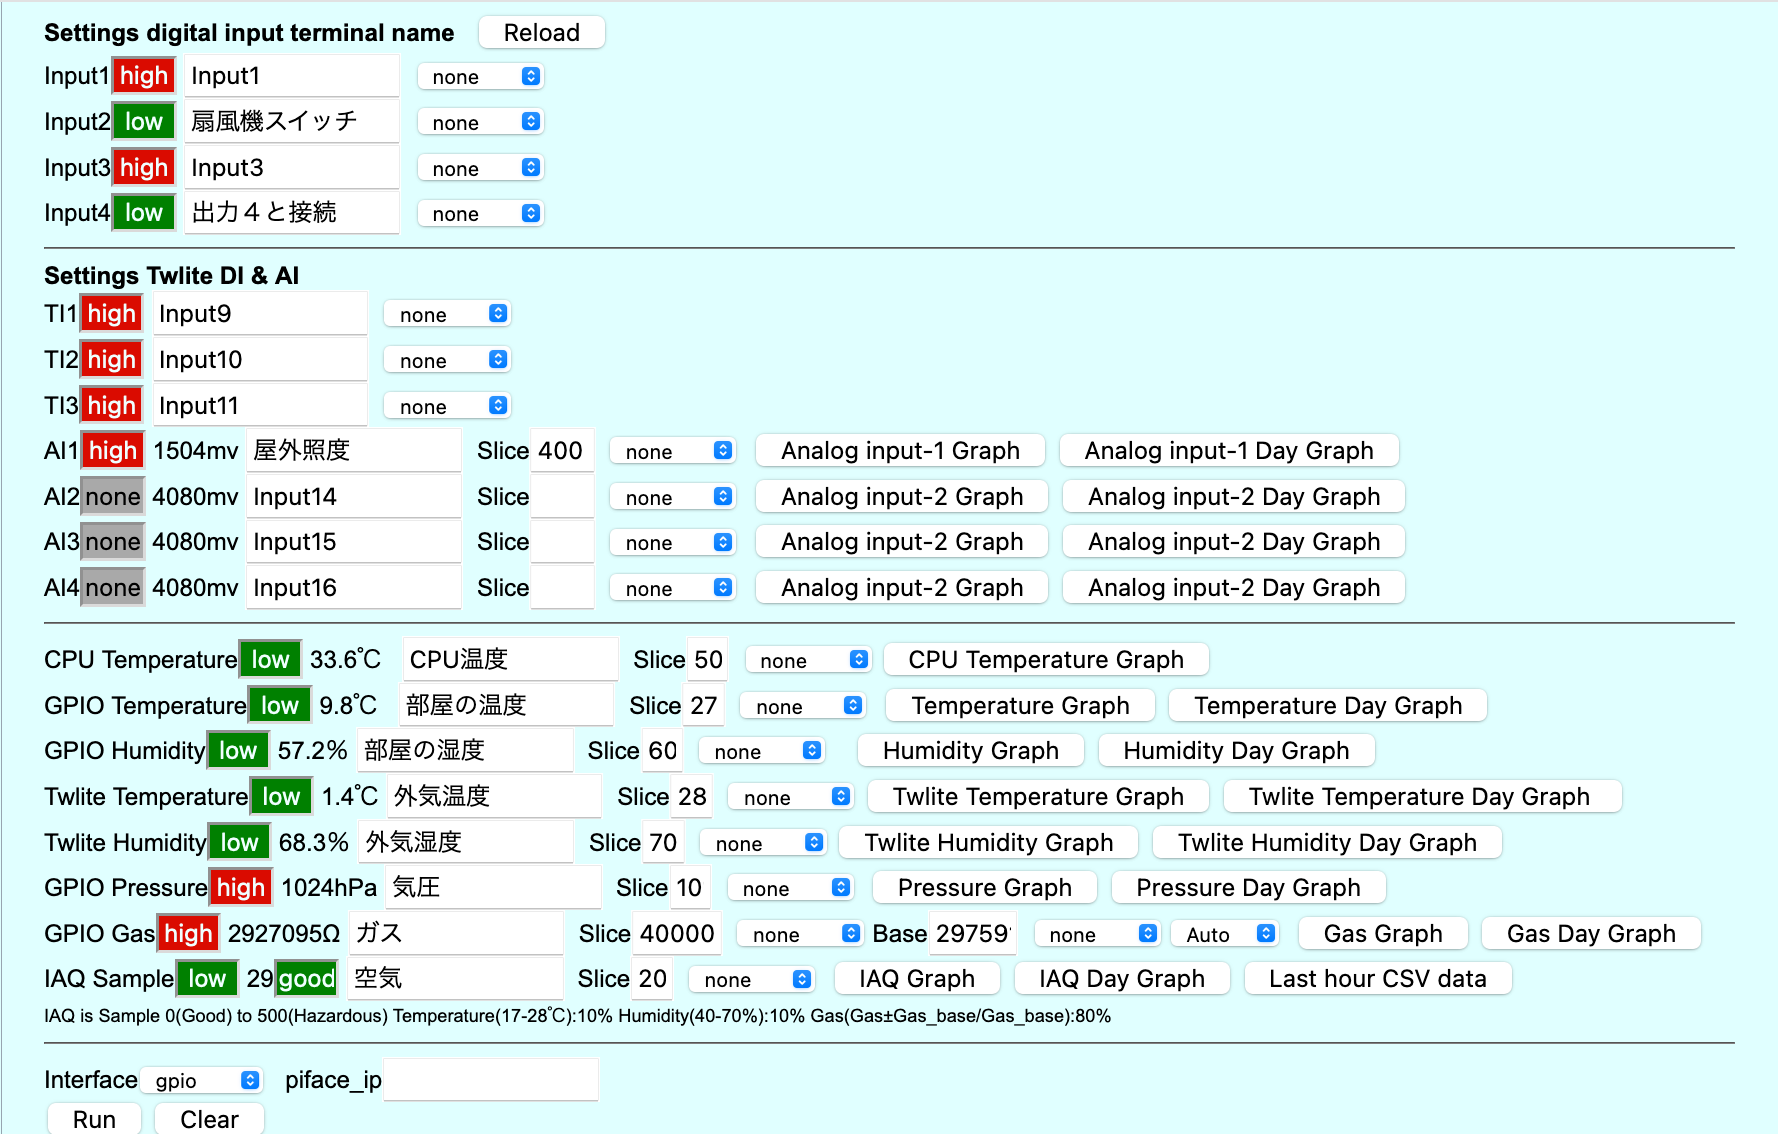
==input list==
1:火事です=high
2:扇風機スイッチ=low
3:Input3=high
4:出力4と接続=high
5:Input5=none
6:Input6=none
7:Input7=none
8:Input8=none
9:防犯センサー=high
10:Input10=high
11:Input11=high
13:屋外照度=high
14:Input14=none
15:Input
15=none
16:Input16=none
17:CPU温度=high
18:部屋の温度=low
19:部屋の湿度=low
0:外気温度=high
21:外気湿度=low
22:気圧=high
23:ガス=high
24:空気=low
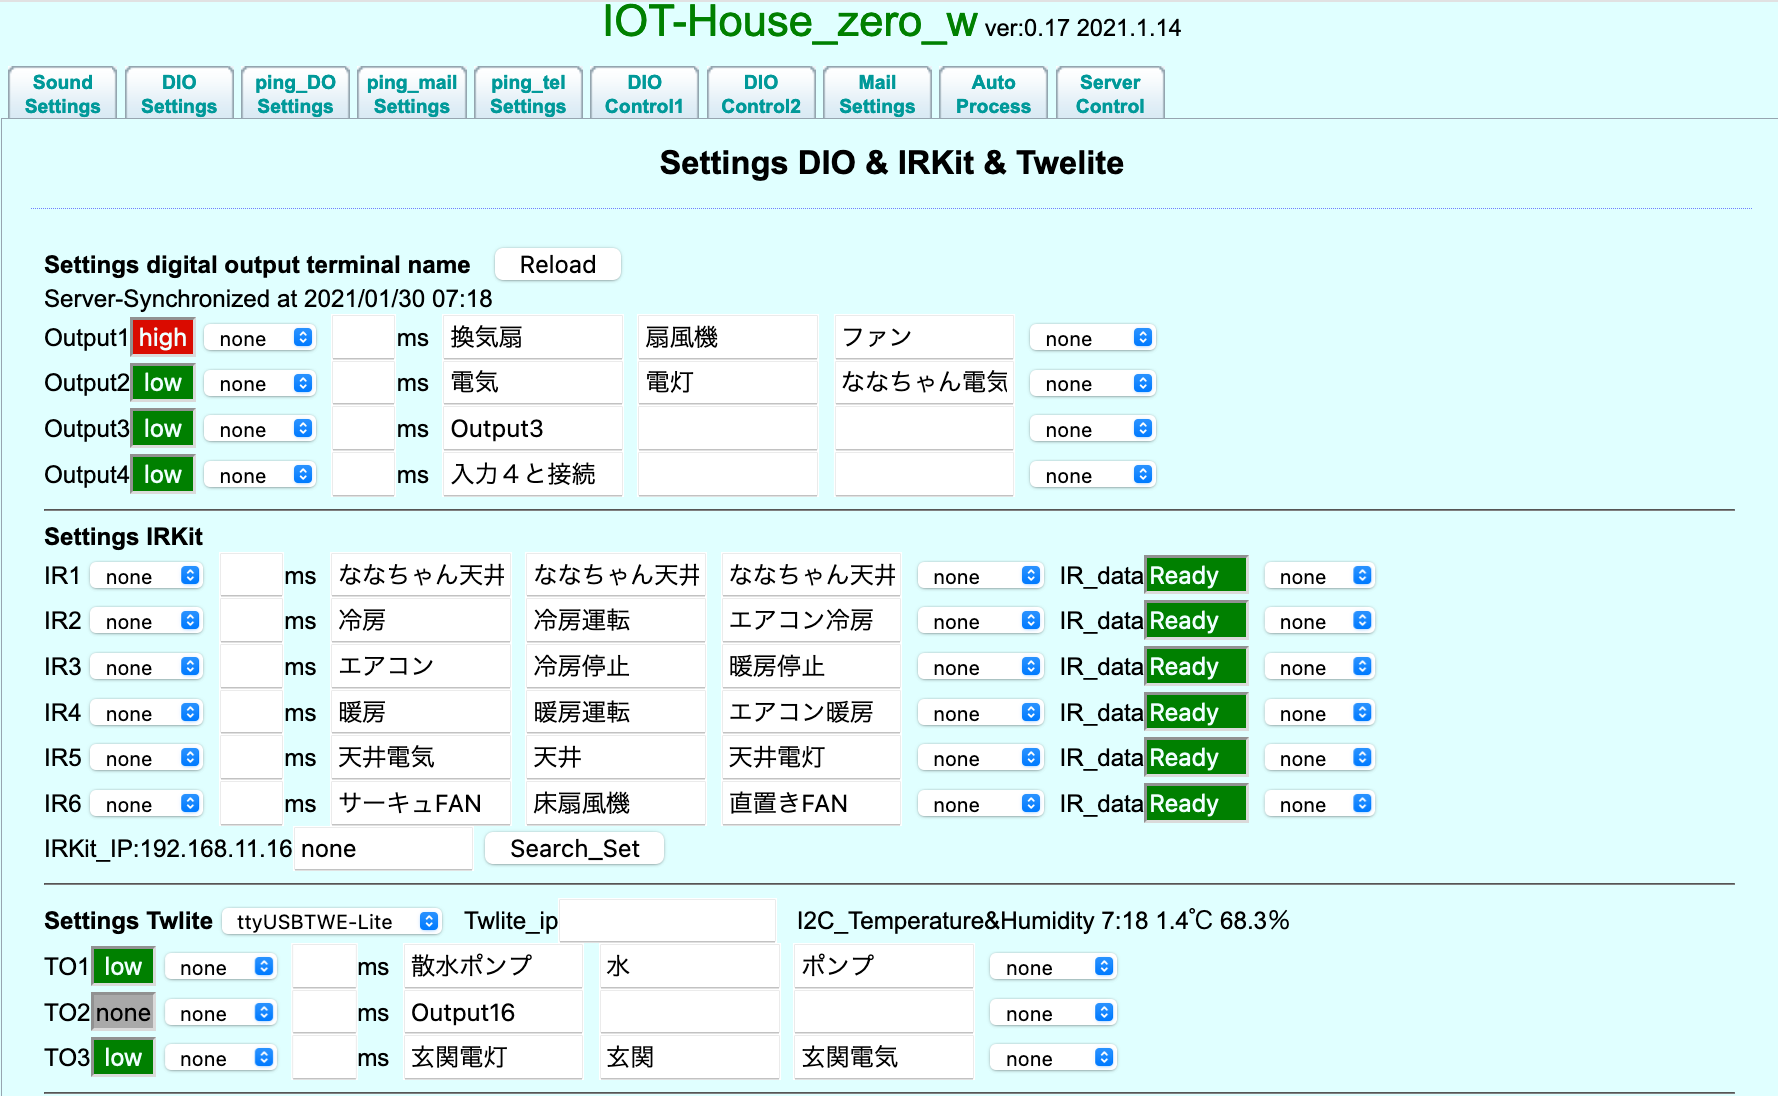
==output list==
1:換気扇=high
2:電気=low
3:Outnput3=low
4:入力4と接続=high
5:Outnput5=none
6:Outnput6=none
7:Outnput7=none
8:Outnput8=none
9:ななちゃん天井電灯
10:冷房
1:エアコン
12:暖房
13:天井電気
14:サーキュFAN
15:散水ポンプ=low
16:Outnput
16=none
17:玄関電灯=low
==Other Command==
21:CPU Temperature
22:GPIO Temperature&Humidity
23:No1 Camera Movie
24:No1 Camera Picture
25:No2 Camera Movie
26:No2 Camera Picture
27:No3 Camera Movie
28:No3 Camera Picture
29:Module Camera Movie
30:Module Camera Picture
31:Twlite Temperature&Humidity
32:CPU Temperature&Graph
33:GPIO Temperature&Graph
34:GPIO Humidity&Graph
35:Twlite Temperature&Graph
36:Twlite Humidity&Graph
37:GPIO Pressure&Graph
38:GPIO Gas&Graph
39:GPIO IAQ&Graph
40:GPIO Last Hour CSV Data
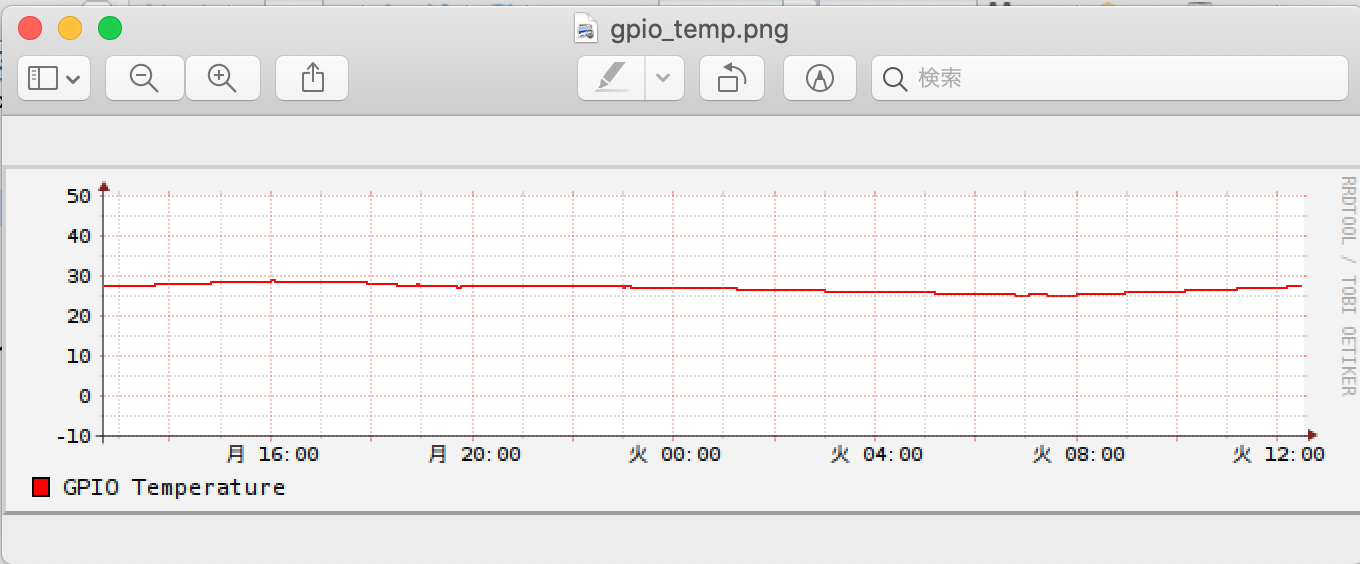
Request temperature graph
To: dokokanodareXX@gmail.com
Subject: iot009 33
Body: none
Mail Response
From:root <dokokanodareXX@gmail.com>Date: Tuesday, September 22, 2020 12:53 10:53To:dokokanodareXX@gmail.comSubject:iot009 IOT-House report
Body : GPIO Temperature Graph Report